Adding Character tags in Comic Easel
You don’t need a subscription to read today’s post!
This is a re-post from the Webcomics.com archive. If you’ve ever been curious about the kind of information, tutorials and advice that you’ll get as part of your subscription to Webcomics.com, this is a good example.
If you’d like to join the site, you can get a 12-month subscription for $30 — or you can get a one-month Trial for $5 … with no obligation after your 30 days expire. For less than three bucks a month, you can get a steady flow of information, tutorials and advice targeted towards your webcomic business — plus a private forum to discuss issues with other professionally minded cartoonists.
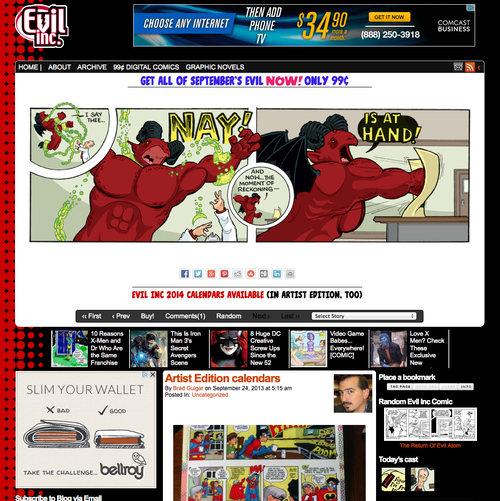
Since switching to Comic Easel, I’ve become a big fan of character tags. Using character tags, I can give readers more information about the characters that appear in a specific update. You can see it in action below.
When the user hovers the cursor over the headshot, they get a brief intro to the character.
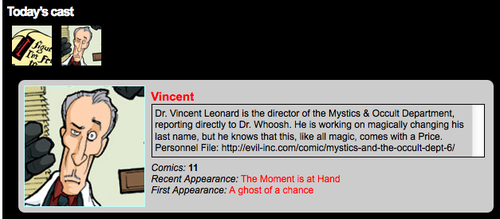
And clicking the headshot takes the user to an archive thumbnail page containing all of the tagged appearances of that charater.

Here’s how to set it up in Comic Easel. I’m assuming that the updated version of ComicsPress has a similar functionality.
List your characters
Under the Comics menu (on the left-hand side of your WordPress dashboard), click Comics and then Characters. Here, you can input as many characters as you’d like. Give each character a name, a slug and a short description.
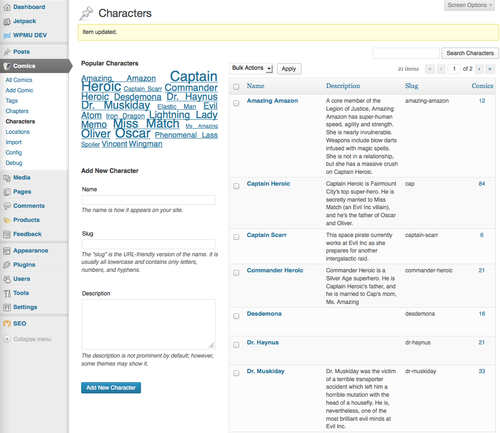
The “slug” that you give the character will be the name of the image file that you upload to display when the character is tagged for a comic update. You don’t need to include the suffix (.jpg, .png, etc). But you do need to follow an all-lowercase / no spaces convention.
Create the headshots
Next, create a headshot for each character. The default size is 150×150 pixels. Give each headshot file a name that coincides with the proper character-tag slug.
You will upload these to your site’s Web server, in the “images” folder.
Do a little CSS
Don’t panic. It’s easy.
In your WP dashboard, click on Appearance and then Editor.
Open your style.css file.
For each character you will add the following code
.character-slug {
background: url('http://evil-inc.com/images/slug.jpg') top center no-repeat;
}
Where I have the word “slug” bolded above, you will enter the slug you created for the character in the first step.
Now it’s a simple matter of noting which characters are present when you upload each new update. You’ll find the proper field near the bottom of the right-hand column of the “Add Comic” interface. Remember, you can click and drag that field to place it higher in the column.
When you’re finished, don’t forget to click Update.
Position the widget
Go to Appearance -> Widgets in your WP dashboard and drag Comic Easel Cast Hover to the appropriate sidebar.
Updating the archive
Updating your archive needn’t be overly stressful. Remember, when you’re looking at your archive in WordPress, there’s a Bulk Actions button. (It’s in the left-hand corner right under the title “Comics”.)
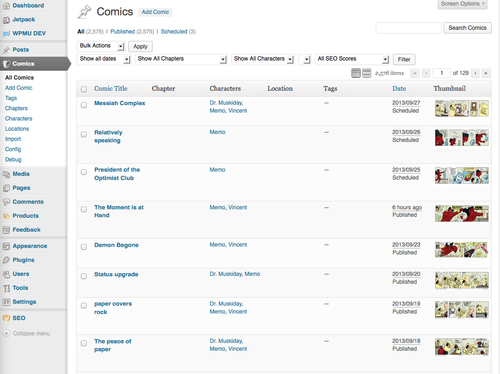
This is a good way to tag multiple updates at once.
- Click each update in which a character(s) appear.
- Click Bulk Actions
- Select Edit
- Enter the names of the character(s) that appear in your selected upodates
Note that you can select an update that already has character tags listed and add additional names through a bulk action.
So, I’ve been making my way, page by page, through the Evil Inc archive by selecting all of the strips that feature a certain character and adding the names via bulk edit. I try to catch as many as possible through bulk edits. Then, I’ll add any necessary characters in individual entries via Quick Edit.


Recent comments